When the nose mouth and teeth are drawn you can define the chin area as well. Add the stitching across the hat then work on getting the face drawn starting with the glass eyes.

How To Wet Skin Youtube
In this tutorial ill show u how to colorblend anime skin well only be coloring the anime head but maybe sometime i can show yall a full body coloring t.

. Then with a normal white soft-edged brush at 20 opacity paint over areas of the image to reveal the wet look. They are likely to be less comfortable because theyre not as lightweight as dry clothes but theyre still very interesting. So after an hour-ish of messing around i somehow figured out how to do it yay.
Wet clothes also change the colour of the clothes. Next draw the shadow on the light source side. Though every subject is different I have five tips that will help make your skin tones and textures look more natural realistic and effective.
This will help you to avoid harsh edges. Find this Pin and more on Art Tutorials. Make an oval shape head for the face of your model.
A little bit of olive green on the shadow. Macerated skin looks lighter in color and wrinkly. You cannot obtain convincing skin if you only add black and white to a basic skin tone.
Each subject has different textures colors and nuances. For example a white blouse looks semitransparent while a white blouse sticks to the skin. Illustrate lines forming her long and massive hair making it look real.
As the paper is already wet the watercolors bleed into each other giving natural color transitions. You will now draw in Skin Takers top hat. Use the wet-on-wet technique when painting the skin.
Maceration occurs when skin is in contact with moisture for too long. Another way to draw wet skin is by observing a person wearing wet clothes. Of course all skins are different but you can try this.
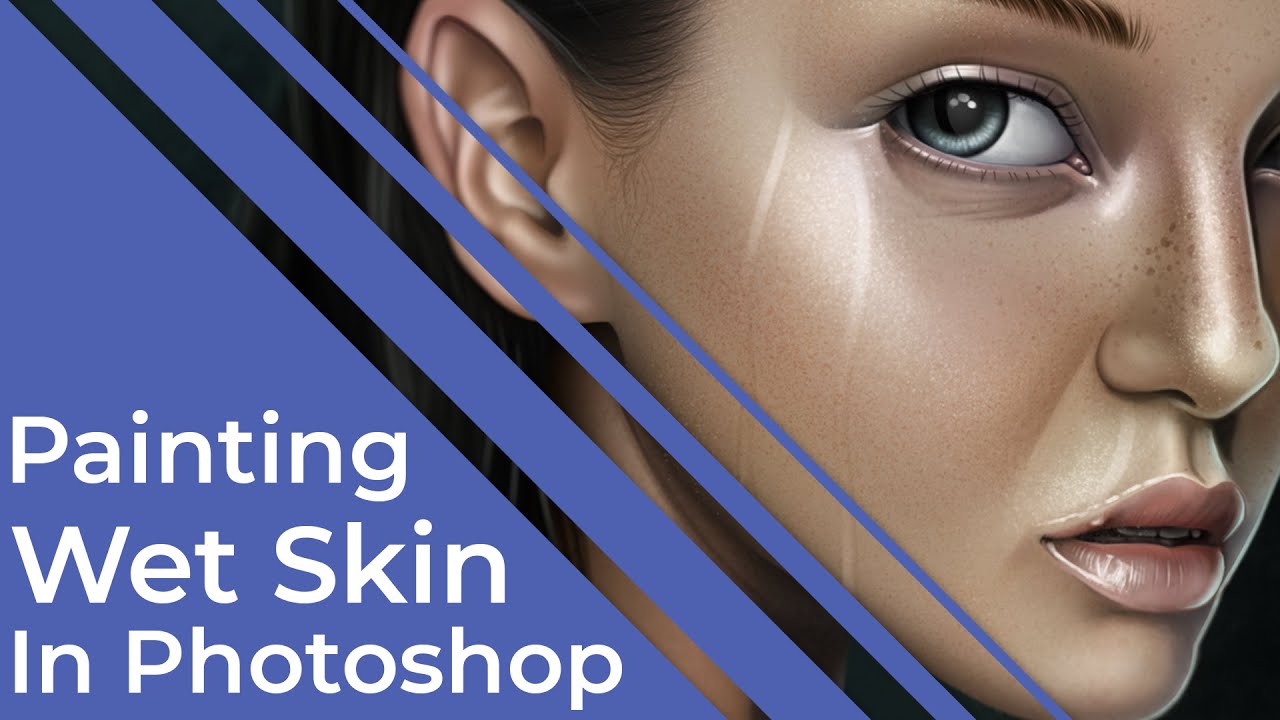
Wet skin is more shiny and reflective than dry skin because there is water on the skins surface. As i was working on a new piece i wanted to do wet skin but didnt really know how to. It is hard to believe someo.
When you select the foundation color it is easy to select when you imagine a little thicker color than before of drawing paper or cloths when they get wet. Acrylic paint left uncovered on a palette will start to form a skin within 10-20 minutes. Making the skin properly shiny.
Making the composition fit. It may feel soft wet or. It may take a day or two to dry completely but it depends upon how thick the layer is.
As for a tea or warm compress apply it to a boil 10-15 minutes at 3-4 times daily. A warm compress can be effective to ripen a boil. Add a black layer mask to the wet look layer by OptionAlt-clicking the layer mask at the bottom of the Layers panel.
What makes skin tones and textures hard to draw is that there are no standard characteristics. OPEN acrylics or acrylic paints with retarders can stay wet for at least a month if stored under the proper conditions. A little bit of blue under the eyes lower lids.
As you can see the lid for the hat is thickest. The second step on the guide how to draw a wet hair is to add her facial features making sure all parts were present. Drawing realistic water effect and wet skin Realistic drawing part 2Hyperrealistic pencil drawings are quite an artistic feat.
Up next sketch out the layer of cloth that covers Skin. Creating wet skin involves three key steps-1. Its not quite complete yet but heres what i did to get the wet skin look.
To do this draw a character select the color of water you want and draw. Apply several brush strokes to build up the opacity in areas where you want the wet look to be more visible. In addition to being more shiny there will also be some.
Apply The Poultice Every 3-4 hours. A little bit of red on the. If our figure is to have wet skin then we want our composition to support that.
Additional Tips From The Experts. Its more complex than that. This technique involves pre-wetting the surface of the paper where the skin will be then dropping in your mixed skin tones and shadows onto the wet surface.
2Draw in the shadow. First make a new layer place it on the foundation layer and do clipping. When a character sits or swims the water envelops him.
I searched for tutorials but couldnt find anything useful i suck at searching. According to Victoria First Aid poultices should be changed every four hours or until the infection dries out fully. Adding water drops on top of the skin.
Reduce the transparency of this layer so that it is clear that the water is transparent.

Paint Wet Skin On Behance

Paint Wet Skin In Photoshop Tutorial Youtube

Wet Skin Droplet Tutorial Skin Drawing Skin Color Palette Body Drawing Tutorial

Antony Ward Paint Wet Skin

Supul Amarakoon Wet Skin Study
Pin On Tutorials

Wet Skin Brushes Clip Studio Assets
Paint Wet Skin In Photoshop Youtube
0 comments
Post a Comment